Continuous lighting for video refers to a lighting setup where the light source remains constantly illuminated throughout whole video recording sessions. It offers continuous and consistent illumination unlike strobe or flash that creates quick bursts of light. It enables video creators to observe how light impacts the scene in real time, making it easier to change and manage lighting while recording. It is commonly used in various video production settings, including interviews, product shoots, vlogging, and filmmaking.
What are continuous video lights?
Continuous video lights are artificial lighting sources that illuminate the subject constantly. They do not flash on and off as you shoot videos; rather, they stay bright throughout the shooting. Technically speaking, we are constantly exposed to continuous illumination. It is used in our homes, shops, streetlights, and other applications.
However, Continuous lighting for video in the studio is specially developed for video and photography applications. You may place them on a stand, move them around the room, and apply modifiers to shape, direct, or diffuse the light.
Best continuous light for video: Four picks at COLBOR
Here are four popular choices suitable for different budgets at COLBOR. You can select one or more of them to work as the source of continuous LED lighting for video.
COLBOR PL8B: Battery operated continuous light for video under $50
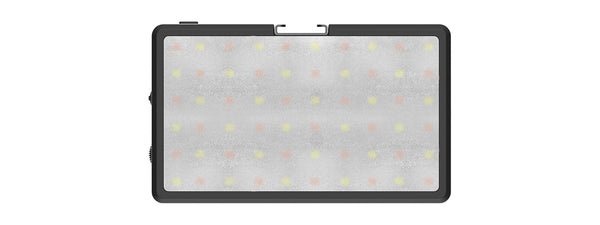
The COLBOR PL8B serves as a portable lighting solution for photography and video production with smartphones or cameras. It can be easily attached to the camera using the cold shoe mount accessory, while the magnetic back allows for simple attachment to a smartphone and any metal surfaces. Additionally, it is convenient to mount on stands and tripods via its 1/4’’ screw hole. The PL8B offers adjustable brightness and color temperatures, as well as 10 lighting effects for video creation. With a large 5000mAh inbuilt battery, it provides up to 125 minutes of continuous operation at 100% brightness.
Key features
- Color temperature adjustable from 2500K to 9000K
- A high CRI of 98+ for accurate color reproduction
- Physical and app controls available
- 10 lighting effects
Reasons to buy
- Extremely small in size
- It can be attached or mounted anywhere you want
- Capable of functioning as a power bank when necessary
Reasons to avoid
- Not suitable for extended video recording sessions exceeding 3 hours
- Remember to consider the need for recharging
COLBOR CL60M: Continuous lighting for video under $150
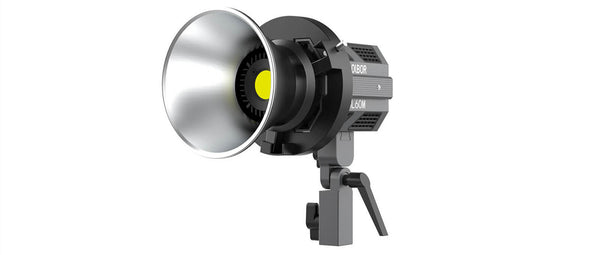
The COLBOR CL60M is among the top options for continuous lighting for DSLR video, especially for content creators who travel frequently, have limited space, or want a simple yet effective lighting solution. With a 65W output, it provides ample brightness for most close-to-mid-range situations, like recording in a studio or speaking to the camera. The Hummingbird-Intelligence Cooling System helps maintain a cool temperature. Additionally, it offers improved versatility with various power sources, including a power adapter, V-mount battery, power bank, and NP-F battery. To enhance the flexibility of the LED video lighting, a Bowens mount adapter is supplied to enable use with standard modifiers.
Key features
- 5600K color temperature
- 97+ CRI for reproducing colors accurately
- Offers 5600K daylight light of 22,540lux at 1m when used with the supplied reflector
- 7 lighting effects
- Physical, app, and remote controls are available
- Quiet cooling fan
- Bowens-mount compatibility
- Can be combined to get higher output
Reasons to buy
- Powerful light output considering its compact size
- Portable
- Equipped with an efficient cooling fan for quiet operation
Reasons to avoid
- Less suitable for capturing footage in large settings
- Color temperature is not adjustable
- Higher cost associated with combining two or more units
COLBOR CL100X: A good tool in continuous lighting kit for video under $200

Offering a variable color temperature range from 2700 to 6500K suitable for indoor, outdoor, and mixed lighting scenarios, the COLBOR CL100X is an ideal option of continuous lighting for video for on-location shoots and dimly lit studios. Capable of serving as a primary light source, it enables seamless adjustment of brightness levels to achieve the desired illumination. Featuring user-friendly operation and utilizing advanced COB light technology, this light ensures precise color reproduction and well-illuminated subjects, making it a versatile choice for continuous light for photography as well.
Key features
- Color temperature adjustable from 2700K to 6500K
- 97+ CRI for reproducing colors accurately
- Offers 5600K daylight light of 25,070lux at 1m when used with the supplied reflector
- 10 lighting effects
- Physical, app, and remote controls are available
- Quiet cooling fan
- Bowens-mount compatibility
- Can be combined to get higher output
Reasons to buy
- Powerful light output considering its compact size
- Portable
- Bi-color continuous light for creating various video moods
Reasons to avoid
- Higher cost associated with combining two or more units
COLBOR CL220R: RGB continuous video light under $400

When building your continuous video lighting kit, the COLBOR CL220R RGB LED light is an excellent choice. As ambiance is a crucial element in video production, the CL220R offers complete control over color hue, saturation, and brightness, allowing you to tailor the lighting to your desired effect. With 13 lighting effects and a CRI rating of 96+, this light provides top-quality illumination for any filming situation. In addition, the 220W allows it to work as the key light in your video creation. It is also good to use it add uniqueness to your video production background.
Key features
- Full-color lighting options
- M/G (Magenta/Green) balance function
- Adjustable color temperature from 2700K to 6500K
- 96+ CRI for reproducing colors accurately
- Offers 30,600 lux of 5600K lighting at 1m when used with supplied reflector
- 13 lighting effects
- Physical, app, and remote controls are available
- Quiet cooling fan
- Bowens-mount compatibility
- PowerCube design to combine several units together for higher output
Reasons to buy
- Offers full-color lighting
- Bowens mount and NATO grooves for adding modifiers and shooting accessories
- Equipped with an efficient cooling fan for quiet operation
Reasons to avoid
- A bit expensive
How to get continuous lighting for video perfectly: 5 steps to follow
To get the best continuous lighting for video, you need to follow these 5 steps:
- Step 1: Prepare the room for a video shot
- Step 2: Choose your continuous lighting source for video
- Step 3: Choose a continuous lighting setup for video shooting
- Step 4: Choose suitable color temperature for video shoots
- Step 5: Pay attention to glares during videography
Read on to get more details.
Step 1: Prepare the room for a video shot
The ideal shooting area is one in which you have the most control over the continuous lighting for video.
Get rid of clutter. A clear, distraction-free environment is good for video recording. When filming in an indoor environment, such as an office or a house, make sure to thoroughly tidy the area that will be captured on camera. Anything that distracts from what you want to convey in the video should be taken away. The purpose is to create a clear, clean canvas that will assist your audience stay focused and engaged. It is recommended that you take a snapshot before beginning to move objects so that you have a reference for correctly placing them in place once shooting is over.
Clean the shooting area. Anything that will stay in your filming environment should be well-cleaned. Dust and smudges can be bothersome. Even the floor should be thoroughly cleaned if it will be captured on camera.
Add props. The items chosen should have a purpose and not detract from the theme of your video. Throw pillows and blankets, for instance, can be utilized to add some coziness to a living room or recreation area.
Be mindful of mirrors. Filming in areas with mirrors may be challenging, not just from a lighting standpoint, but also because it can be difficult to avoid capturing reflections of equipment or crew people in them.
Step 2: Choose your continuous lighting source for video
There are several options to choose from when searching for the constant video light. It’s a good idea to try a few different setups and learn which one works best for you. Some will work more effectively for face lighting and others for creative or dramatic effects. The best way to learn about how to get good lighting for videos is to practice! And here is a comparison table of the aforementioned COLBOR lights to help you make the choice.
|
Video continuous light |
COLBOR PL8B |
COLBOR CL60M |
COLBOR CL100X |
COLBOR CL220R |
|
CRI |
≥98 |
97+ |
97+ |
96±2 |
|
Illumination |
/ |
3243Lux (at 1m 5600K, No Reflector); 22540Lux (at 1m 5600K, With Reflector) |
3,680Lux (at 1m 5600K, No Reflector); 25,070Lux (at 1m 5600K, With Reflector) |
7,100Lux (at 1m 5600K, No Reflector); 30,600Lux (at 1m 5600K, With Reflector) |
|
Color temperature |
2500K-9000K |
5600K (±200K) |
2700K~6500K(±200) |
2700K-6500K (±200) |
|
Dimension |
125x75x17mm |
140x80x90mm |
152x80x90mm |
240x128x219mm |
|
Weight |
187g |
550g |
800g |
1.6kg |
|
Price |
$49.00 |
$129.00 |
$199.00 |
$399.00 |
Note: The price is from B&H Store.
Step 3: Choose a continuous lighting setup for video shooting
You have several choices to set up continuous lighting for video, including commonly used 3-point lighting, two-, four-, and one-lighting setups. Each choice produces a slightly different outcome, so read on to find out which scheme you should use to provide the greatest lighting for your videos.
Three-point lighting
Description: As the name implies, it uses 3 lights. That is, a key, a fill, and a back light. In this setup, the key and fill lights are placed on either side of the camera and pointed toward the subject. The backlight is placed behind and is positioned either above or to the side of the subject.
Pros: It separates the subject from the backdrop and offers great highlights around him/her.
Cons: It requires many pieces of lighting equipment.
For whom: It is ideal for Youtubers and Streamers, as well as any videos with a single person speaking to the camera.
Two lights
Description: Two lights, key and fill, are used in this setup. It can be made more effective by adding a bounce card. Whether utilized in conjunction with a natural light source or with your key light focused on it, it will assist in improving the facial lighting. For optimal lighting results, set the continuous lighting for video above your subject's height.
Pros: It has fewer limits on filming spaces.
Cons: If you rely on natural light to achieve this setup, it may be restricted by the time of the day and the weather.
For whom: It is a good choice for video type in which the subject needs to stand up and move around.
Four lights
Description: This is an extension of the three-point setup that includes a backdrop light, which is positioned at waist height behind the subject, directed toward the wall or backdrop in front of them.
Pros: Illuminates the wall behind, allows for a more creative study of the use of continuous lighting in video.
Cons: It requires more pieces of equipment and more time to set up and tear down the equipment.
For whom: Video creators looking for more pro and creative lighting possibilities.
One light
Description: A video lighting system with only one light. A continuous ring light for video is the ideal solution for this setup.
Pros: It needs minimal equipment.
Cons: It creates less depth than the multi-light solutions.
For whom: Videomakers who use their mobile phones to shoot videos
Step 4: Choose suitable color temperature for video shoots
Not all lights are made equally. Depending on the kind of bulb, lights may look "cooler" or "warmer" on camera. The human eye can also detect this difference.
Consider the visual differences between a doctor's office (cold fluorescent lighting) and a cozy living room atmosphere. Warmer light is often yellower, but cooler light has more white or light blue tones.
This idea is known as color temperature, and it may be measured on a Kelvin scale.
It's recommended not to blend lights with various color temperatures. To achieve equal coloring, LEDs benefit from the ability to adjust the color temperatures. Mixed temperatures can cause poor color balance, resulting in an unnatural-looking video.
Step 5: Pay attention to glares during videography
Glare on glasses may be a major concern, particularly with bulbs that provide harsher, more direct light. You can usually solve it by elevating your lights up on their stands. If this doesn't work, try moving your key and filling the lights further out while keeping them roughly equal.