Having the best lighting for studio photography is one of the most important aspects of photography. If a customer cannot see what is in their photograph, it makes no difference how wonderful the composition or how crisp the photograph is; they will reject your work. In this article, we will tell you how to set up lights for photography studio by illustrating the video by the YouTuber Shoot Film Like a Boss. He uses two COLBOR lights and several modifiers to create different lighting effects in the home studio portrait photography. Read on to see how he set up everything.
Video by Shoot Film Like a Boss
Use COLBOR CL100X and reflector to create key and fill light in studio photography
Firstly, let’s have a look at what is COLBOR CL100X and then see how the YouTuber Shoot Film Like a Boss sets it up.
The COLBOR CL100X is one of the LED lights for studio photography at bi-color color temperature. It can be adjusted from 2700K to 6500K to match the ambient lighting or create different moods for studio photography. The brightness is also adjustable at 0-100% to offer illumination of different intensities.
The CL100X offers continuous lighting for studio photography. This is quite helpful when you illuminate a studio since what you see is what you get. You can adjust it and monitor the effects in real time to avoid shadows or reflections that you don’t want.
Plus, the supplied Bowens-mount adapter allows you to use most of the standard modifiers to shape, direct, or color the lighting. You can also combine several CL100Xs to get higher power output for a larger photography studio. The app control allows for user-friendly adjustments even when the CL100X is out of reach.
In this video, the YouTuber Shoot Film Like a Boss adopts two lighting techniques for studio photography to get different looks.
Rembrandt lighting is one of the best lighting for studio photography. To achieve this look, the YouTuber mounts the light on a light stand and attaches the supplied reflector to it. The CL100X is set at 5200K color temperature and 20% power. He also uses a reflector panel to bounce some of the light back to the subject and fill in the shadows. He places the light at a 45-degree angle to the subject, which creates a Rembrandt look. This means that the shadow of the nose falls slightly below the eye on the opposite side of the face. This is a common and versatile lighting pattern that works well for most subjects and facial features.

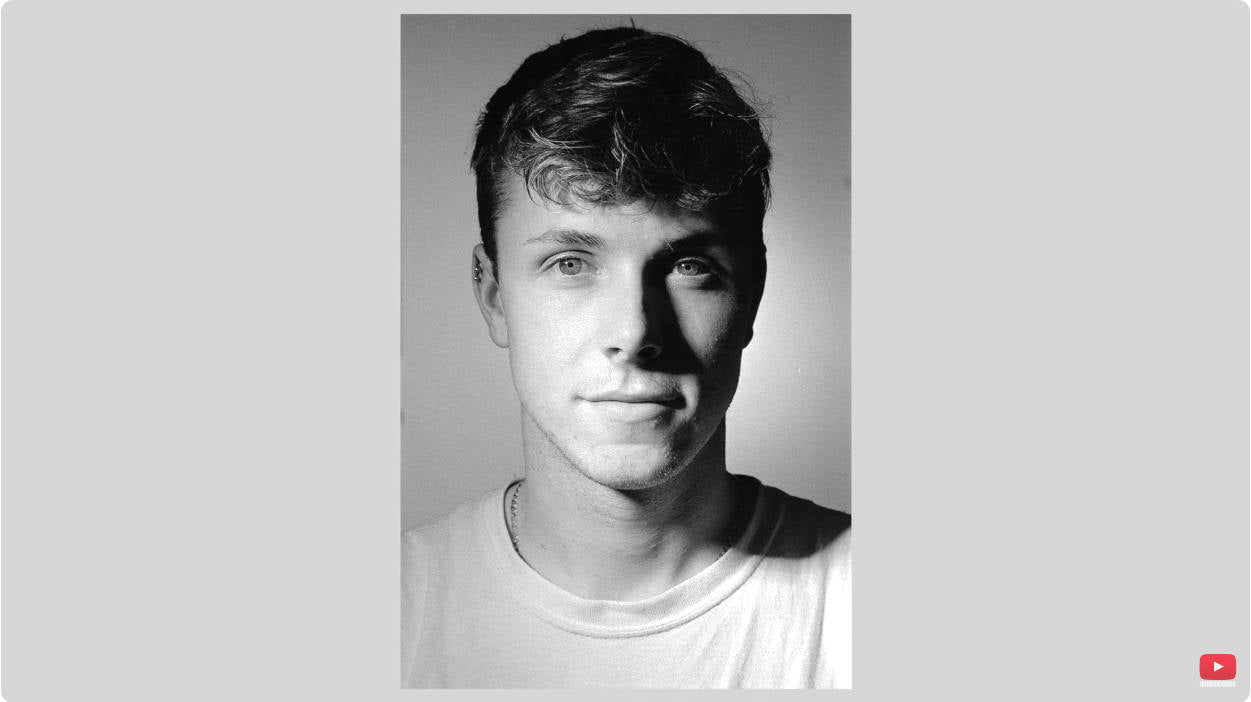
It is also good to remove the reflector panel, set the CL100X at 100% brightness, and place a diffuser in front of it to create a softer and more flattering effect on the subject’s skin. And this is the final image.

For the butterfly lighting, the subject sits down and the CL100X is pointed down over his hair. In this way, we have got his hairline, the shadow underneath his nose, and also underneath his neck. You can get a harsh look by setting the lighting at 5200K color temperature at 20% brightness without diffusion. Just like the image below.

To fill in some harsh shadows, the YouTuber places a reflector panel underneath the subject’s face. Here is what the final image looks like.

Use COLBOR CL100X to create background lighting
When being used to illuminate the background, the COLBOR CL100X is mounted on the light stand for YouTube studio photography, used with the supplied reflector, and set at 5200K color temperature with 20% brightness. It lights up the background and makes a hot spot behind the subject’s head.
Thanks to the Bowens-mount adapter, you can also use other reflectors with broader beam angles. This can spread the light out even more.
Use the COLBOR CL60R to get the best hair or rim lighting for studio photography
The rim light or hair light shines on the subject from behind, often, but not necessarily, to one side or the other. It gives the subject a rim of light, serving to separate the subject from the background and highlighting contours. You can see how COLBOR CL60R RGB LED light is used for rim light in another video by the YouTuber David Zhou. The CL60R is used with the softbox to cast flattering illumination on his hair and shoulder. You can also use it to create different colors of lighting for studio photography to get dramatic effect.
Video by David Zhou
FAQ about best lighting for studio photography
How to use lighting equipment for photography studio?
All these lights for studio photography may be modified using the buttons and wheels on the body to change the brightness, color temperature, and light effect. A short press on the wheel toggles between preset brightness and color temperature. You can also control it through the COLBOR Studio App. Check the app user guide to see how to use it to get user-friendly operation.
What light modifiers are commonly used in studio photography?
Light modifiers are devices that change the shape, size, intensity, or quality of light emitted by a flash or a continuous source. Depending on your aims and preferences, they help create various effects and moods in your studio photography. Below are some commonly used types:
Softboxes: Softboxes are placed between a light source (such as a strobe or continuous light) and the subject. You may use one with strobe or continuous lights to disperse the light evenly. As a consequence, the coverage is attractive and even, with soft-edged shadows and few hotspots. Softboxes are typically extremely big and more difficult to put up and dismantle than other solutions.
Umbrellas: Umbrellas come in two designs: shoot-through and reflected. Shoot-through umbrellas serve as a quick and easy softbox substitute. They do a good job of diffusing lighting for studio photography, but not as well as a softbox. With reflected umbrellas, you focus the light away from the subject and bounce it back at them, thereby acting as a bowl reflector. Both types of umbrellas are small and simple to set up and take down.
Beauty dishes: These are metal dishes with a center deflector and a reflecting surface. They may be fastened to a bracket or a light source. They may provide a contrasty, harsh, and round light that is ideal for glamor, fashion, and beauty shots. Beauty dishes may draw attention to the eyes and draw attention to specific facial characteristics. To alter the effect, they may also be adjusted with diffusers, color gels, or grids.
Grids: These are attachments in the shape of honeycombs that may be placed over modifiers or light sources. They have the ability to restrict, concentrate, and produce a spectacular beam of light. They can be employed to provide a spotlight effect or to draw attention to a particular area of the subject or backdrop. Different degrees of grids, such 10°, 20°, or 40°, might have an impact on the light's width and intensity.
Snoots: These are cone-shaped accessories that may be used to cover a light source or a modifier. They can also narrow the light's distribution and produce a tight, focused, and sharp beam. They may be used to make rim lighting, hair lighting, and background lighting. Snoots can also be adjusted using color gels or patterns to achieve a different look.
These are only a few of the various light modifiers available for studio photography. Each has pros and cons, and you may experiment with various combinations and settings to create the desired look.
What studio photography lighting tips can I follow to get better photos?
You may have total control over the lighting in studio photography and produce beautiful pictures. Besides using the aforementioned lighting setups, you can follow the tips below to get the best lighting for studio photography.
Start with natural sunshine. Natural light may offer your subject with gentle, even illumination. You may experiment with different angles and times of day by using a window as a natural light source. You may use a flash to fill up the shadows or create contrast if you need extra illumination.
Use several sorts of artificial illumination. For studio photography, you can use continuous lighting, strobe lighting, or LED illumination. Each style has pros and downsides, so you should experiment to determine which one works best for you. Continuous lighting is simple to use and allows you to preview how the light will look before you shoot. Strobe is more powerful and has the ability to freeze motion; nevertheless, it requires a trigger as well as a sync cable or wireless connection. LED lighting for studio photography is energy-efficient and adaptable, but it is more costly and produces less light.
Learn the fundamentals of light placement for studio photography. You should understand how to employ the key, fill, and backlight to achieve various effects and moods in your photographs. The key light is the primary source of illumination for your subject. The fill light is a supplemental light that helps to soften the shadows created by the key. The light that separates your subject from the backdrop and creates depth is known as the backlight. To produce diverse looks, you may utilize various lighting techniques such as high key, low key, three-point, Rembrandt, butterfly, and split lighting.
Light modifiers can be used to shape and soften the lighting for studio photography. Light modifiers are devices that you may attach to your light source to vary the quality and direction of the light. Softboxes, umbrellas, reflectors, diffusers, grids, snoots, and gels are some typical modifiers. Softboxes and umbrellas produce soft, diffused light that is ideal for portraiture. Reflectors and diffusers bounce or disperse light to fill in shadows and lower contrast. Grids and snoots limit the light beam, creating a spotlight effect. Gels colorize light and produce various moods and atmospheres.
Use a light meter to measure the exposure. A light meter is a gadget that determines the proper aperture, shutter speed, and ISO settings for your camera based on the amount of light in the scene. It can assist you in achieving a balanced and consistent exposure and avoiding photographs that are overexposed or underexposed.